The 101 Guide to Test Android App Using Burp Suite!
Table Of Contents
- Introduction
- Why Test Your App’s Server Connection
- Setup BurpSuite & Certificate
- Setup Device & Push Certificate
- Start Testing!
- Is your app secure enough?
- Security Advice
In today’s interconnected world, ensuring the security of data transmitted between an Android app and its server is paramount. As mobile apps increasingly handle sensitive information such as personal data, financial details, and private communications, a secure connection is vital to protect users from potential threats like data breaches, man-in-the-middle attacks, and other forms of cybercrime.
One of the most effective ways to test and ensure the security of your app’s connection to its server is by using Burp Suite. Burp Suite is a powerful web vulnerability scanner and proxy tool widely used by security professionals to identify and mitigate vulnerabilities in web applications. This article will guide you through the process of using Burp Suite to test the security of your Android app’s server connections, providing you with an end-to-end implementation strategy.
Why Test Your App’s Server Connection?
Before diving into the technicalities of Burp Suite, it’s crucial to understand why testing your app’s server connection is essential:
- Data Integrity and Confidentiality: Ensuring that data sent between the app and the server is encrypted and has not been tampered with.
- User Trust: Secure connections build user trust, which is critical for the app’s reputation and success.
- Regulatory Compliance: Many industries require compliance with security standards and regulations that mandate secure data transmission.
- Preventing Attacks: Identifying vulnerabilities early can prevent various types of cyber attacks, including man-in-the-middle attacks, which can intercept and alter the data being transmitted.
NO MORE TALK! LET’S DO IT!!!!!!
Setup Burp Suite & Certificate
1.Download BurpSuite : https://portswigger.net/burp/communitydownload you can use Community Edition for free!
2. Export CA certificate from BurpSuite : Start your BurpSuite -> Proxy Tab -> Proxy Settings -> Tools -> Proxy -> Import / export CA certificate


After this you will get the exported file with extension [FileName].der, for this example let’s name it burp-ca.der
3. Convert burp-ca.der to system level CA: We need to install this certificate that we exported to our device as System Level CA, use this command to convert it
openssl x509 -inform DER -in burp-ca.der -out burp-ca.pem
openssl x509 -inform PEM -subject_hash_old -in burp-ca.pem |head -1
mv burp-ca.pem <hash>.0
Setup Rooted Device & Push Certificate
1. Setup your device : To make things easier you need to Root your device first, i recommend you for using emulator if you don’t have rooted device beforehand. I also recommend you to create the emulator without PlayStore. For me, i’m using Android Studio Emulator you can use GenyMotion or BlueStack or any Android Emulator out there.

2. Start your emulator using terminal : We need to set the device to be writeable so follow this command
./emulator -list-avds
./emulator -avd [Emulator Name] -writable-system
3. Push the certificate to our sd card :
adb root
adb remount

//Push to device sdcard
adb push <cert>.0 /sdcard/
4. Move the Certificate from sd card to system level ( This is why we need -writable-system flag) and Change our file permission
adb shell
mv /sdcard/<cert>.0 /system/etc/security/cacerts/

//Change our cert file permission
chmod 644 /system/etc/security/cacerts/<cert>.0

//Reboot device after done
reboot
5. After reboot check to your Trusted Credentials
Go to Settings -> Security -> Trusted Credentials, it should be showing the PortSwigger ( Name of BurpSuite Company ) on System Level
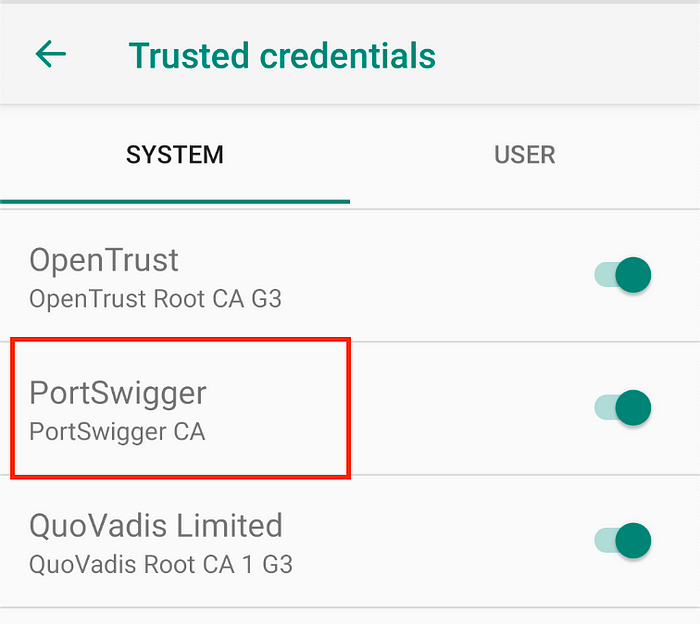
To be note! It should be on SYSTEM not on USER
I’ve seen other tutorial outside that using other method that installed on USER. It is never work for me.
Start Testing!
Now everything has been set now let us start our BurpSuite and start our emulator using this command
./emulator -avd [Emulator Name -writable-system -http-proxy [Proxy]

//Example
./emulator -avd Pixel_5_API_28_NO_PS -writable-system -http-proxy 127.0.0.1:8080
You can check your proxy on BurpSuite, you can change it or let to default settings.
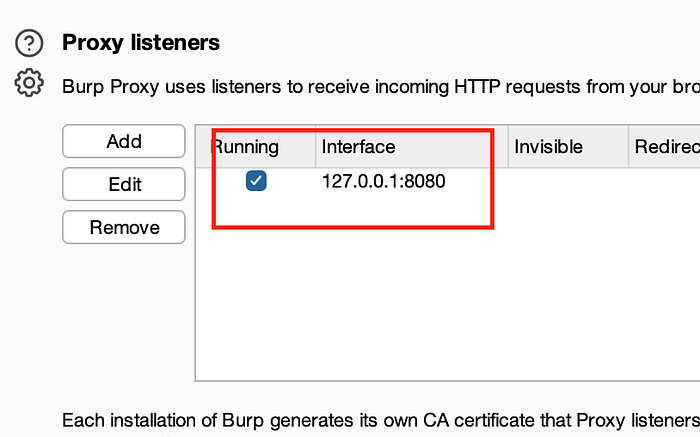
After that BOOM! there are lot of URL on the BurpSuite you can try on some google search and it will intercept your request

Is Your App Secure Enough?
Now that’s the big question! if your app already have some security like implementing SSL Pinning to your certain server
- Your server URL will not shown on the HTTP History
- Your app should not be able to connect to your server, usually it will return 500
Security Advice
I’m not an Expert on this security side, but i want to share my opinion or advice about enhancing your app security on network side
- Use SSL Pinning :
a. You can download your server certificate and embed it to your code b. Pin your public key server ( easier method )
See this reference about Certificate & Public Key Pinning - Encrypt your request and response : Yes i know there is always a way to break any security by using MITM attack, so we can enhance our request and response by encrypt it both side and only the insider know how to decrypt it.
Stay vigilant, stay secure, and happy testing with Burp Suite!
